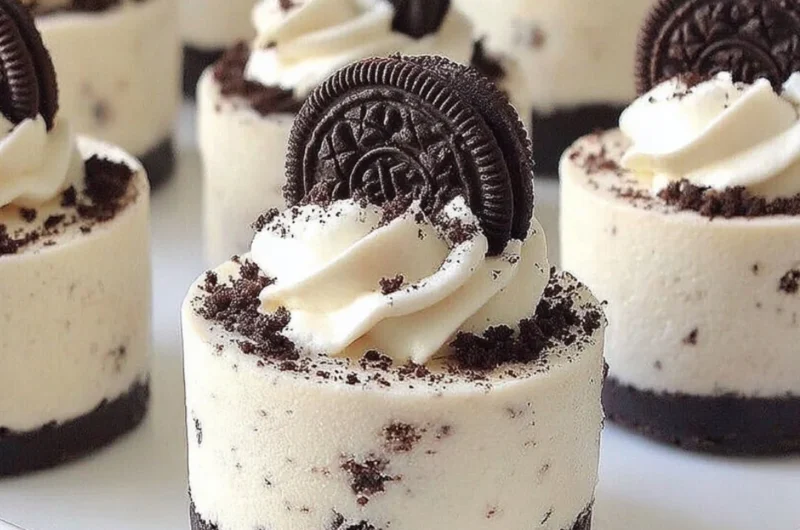
Welcome to Cozy Comfort: No-Bake Oreo Cheesecakes
As I sat in my cozy kitchen, the warm sunlight streaming through the window, I couldn’t help but feel nostalgic about the little treats that filled my childhood. There’s something incredibly comforting about a dessert that combines creamy delights with a touch of nostalgia. That’s exactly what my No-Bake Oreo Cheesecakes deliver—a dreamy combination of rich creaminess and the sweet crunch of chocolatey cookies, perfect for any season.
When life feels a bit hectic, and you’re in need of something sweet without the fuss, this easy no-bake dessert is the answer. It brings smiles, laughter, and a sprinkle of joy, making it the perfect crowd-pleaser for gatherings with friends and family or simply as a treat after a long day. I can already picture you whipping these up for your next gathering or enjoying them as a special midnight snack.
This is one you’ll definitely want to pin for later!
Why You’ll Love This Recipe
- Quick to Make: With only a few steps, you can prepare these decadent cheesecakes in no time, making them an ideal choice for busy weeknights or last-minute gatherings.
- No-Bake Delight: Kiss the oven goodbye! These Oreo Cheesecakes come together without any baking required, leaving you free to relax as they chill.
- Crowd-Pleasing: Who doesn’t love Oreos? This creamy dessert is sure to be a hit with everyone and a go-to recipe for all ages.
- Easy to Customize: Whether you prefer classic flavors or want to experiment with unique variations, these cheesecakes are versatile enough to suit every palate.
- Family-Friendly Fun: Get the kids involved! Crushing the Oreo biscuits and layering the ingredients can be a fun family activity that creates cherished memories.
Ingredients You’ll Need for No-Bake Oreo Cheesecakes
To create your creamy, delightful No-Bake Oreo Cheesecakes, gather these simple ingredients:
- Oreo biscuits (crushed)
- Cream cheese (or vegan cream cheese)
- Powdered sugar
- Whipped cream (or whipped coconut cream)
- Cookie crumbles (for topping)
Let’s Make It Together
Follow these simple yet delightful steps to whip up your own No-Bake Oreo Cheesecakes:
-
Crush Oreo biscuits: Start by crushing the Oreo biscuits to a fine crumb texture. You can use a food processor or a rolling pin to make it fun! Press this crumb into the base of your serving cups, creating a solid layer.
-
Mix cream cheese and sugar: In a bowl, mix together the cream cheese and powdered sugar until smooth and creamy. This is the foundation of your cheesecake filling.
-
Fold in whipped cream: Gently fold in the whipped cream (or whipped coconut cream) into the cream cheese mixture, creating a light and airy filling. This step is crucial for achieving that dreamy texture!
-
Spoon the filling: Now, spoon the luscious Oreo cheesecake filling on top of your Oreo biscuit base in the cups. Take your time to make it even and pretty.
-
Add the finishing touches: Top with additional whipped cream and sprinkle cookie crumbles on top for that extra crunch and visual appeal.
-
Refrigerate: To let the flavors mingle and the texture set, refrigerate the cheesecakes for at least 2 hours before serving. Patience is a virtue here!
Fun Ways to Customize It
-
Chocolate Ganache Drizzle: For an indulgent twist, melt some chocolate and drizzle it on top before serving for a rich finish that will have everyone swooning.
-
Minty Fresh: Add some peppermint extract to the filling for a zesty, refreshing mint Oreo cheesecake. Perfect for a cheerful Holiday gathering!
-
Fruit-Inspired Layers: Layer this cheesecake with fresh berries or fruit compote for a tangy contrast that balances beautifully with the sweetness of the cream cheese.
-
Nutty Crunch: Add chopped nuts or a sprinkle of chopped chocolate-covered almonds as a topping for an extra layer of texture and flavor.
Chef Emma’s Helpful Tips
-
Make-Ahead Magic: These cheesecakes can be prepared a day in advance, making them perfect for parties. Just keep them tightly covered in the fridge.
-
Ingredient Swaps: If you’re looking for a lighter version, consider using low-fat cream cheese or Greek yogurt. Also, feel free to swap standard whipped cream for a lighter whipped coconut cream.
-
Serving Suggestions: For easier serving, you can use a mini cheesecake pan instead of cups to create individual servings. Just adjust the chilling time accordingly!
-
Leftover Storage: Store any leftovers in an airtight container in the fridge for up to four days—if they last that long!
What’s Inside – Nutrition Breakdown
- Serving Size: 1 cheesecake cup
- Calories: 320
- Carbohydrates: 30g
- Sugar: 22g
- Fat: 20g
- Protein: 4g
- Sodium: 180mg
Frequently Asked Questions
Can I make this ahead?
Absolutely! These cheesecakes are perfect for make-ahead desserts and will hold beautifully in the refrigerator.
Can I use different ingredients?
Yes! Feel free to substitute with vegan cream cheese or different flavored Oreos for a unique twist.
How do I store leftovers?
Keep them in an airtight container in the fridge for up to four days for a delicious treat anytime!
How long does it last?
If properly stored, your No-Bake Oreo Cheesecakes should stay fresh in the refrigerator for about four days.
Wrapping It Up
These No-Bake Oreo Cheesecakes aren’t just a recipe; they’re a vessel for creating warm, joyous moments with your loved ones. Each creamy bite will transport you back to sweet memories while creating brand new ones.
Save this No-Bake Oreo Cheesecakes recipe to your desserts board so it’s ready when you need a cozy treat! With every recipe I share, my hope is to inspire you to fill your kitchen with warmth, love, and deliciousness. Happy baking!
Print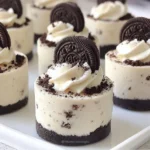
No-Bake Oreo Cheesecakes
- Total Time: 135 minutes
- Yield: 4 servings
- Diet: Vegetarian
Description
Indulge in these creamy No-Bake Oreo Cheesecakes, a delightful combination of rich creaminess and crunchy Oreos, ideal for any occasion.
Ingredients
- Oreo biscuits, crushed
- Cream cheese (or vegan cream cheese)
- Powdered sugar
- Whipped cream (or whipped coconut cream)
- Cookie crumbles (for topping)
Instructions
- Crush Oreo biscuits: Start by crushing the Oreo biscuits to a fine crumb texture. You can use a food processor or a rolling pin to make it fun! Press this crumb into the base of your serving cups.
- Mix cream cheese and sugar: In a bowl, mix together the cream cheese and powdered sugar until smooth and creamy.
- Fold in whipped cream: Gently fold in the whipped cream (or whipped coconut cream) into the cream cheese mixture.
- Spoon the filling: Spoon the Oreo cheesecake filling on top of your Oreo biscuit base in the cups.
- Add the finishing touches: Top with additional whipped cream and sprinkle cookie crumbles on top.
- Refrigerate: Refrigerate the cheesecakes for at least 120 minutes before serving.
Notes
These cheesecakes can be prepared a day in advance. Store leftovers in an airtight container in the fridge for up to four days.
- Prep Time: 15 minutes
- Cook Time: 0 minutes
- Category: Dessert
- Method: No-Bake
- Cuisine: American
Nutrition
- Serving Size: 1 cheesecake cup
- Calories: 320
- Sugar: 22g
- Sodium: 180mg
- Fat: 20g
- Saturated Fat: 12g
- Unsaturated Fat: 6g
- Trans Fat: 0g
- Carbohydrates: 30g
- Fiber: 1g
- Protein: 4g
- Cholesterol: 50mg